Miele F 9052 i User Manual
Browse online or download User Manual for Fridge-freezers Miele F 9052 i. Operating and installation instructions Freezer F 9052 i F
- Page / 48
- Table of contents
- BOOKMARKS
- F 9052 i 1
- F 9252 i 1
- Contents 2
- Guide to the appliance 4
- Caring for the environment 5
- Correct application 6
- Safety with children 6
- Technical safety 7
- Correct use 8
- Disposal of your old freezer 10
- How to save energy 11
- ; flashes in the temperature 13
- Switching on and off 13
- The correct temperature 15
- Activating the alarm system 18
- Switching the alarm off early 18
- Temperature alarm 18
- Door alarm 18
- Super freeze 19
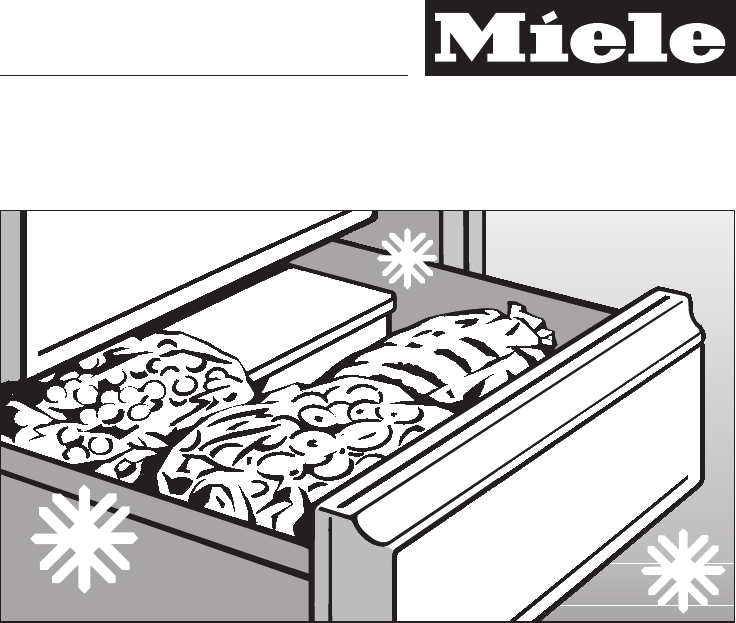
- Freezing and storing food 20
- Defrosting the appliance 25
- Cleaning and care 27
- Problem solving guide . . ? 28
- After sales service 32
- Electrical connection 33
- Installation 34
- Building-in dimensions 36
- Changing the door hinging 37
- Building in the appliance 40
- Adjusting the door hinges 45
- M.-Nr. 07 021370 / 00 48
Summary of Contents
Operating and installation instructionsFreezerF 9052 iF 9252 iTo avoid the risk of accidents ordamage to the appliance, it isessential to read these i
Disposal of your old freezerBefore disposing of an oldappliance, first make the door latchor lock unusable.This way you will prevent children fromacci
Normal energyconsumptionIncreased energyconsumptionInstallation site In a ventilated room. In an enclosed, unventilated room.Protected from direct sun
Normal energyconsumptionIncreased energyconsumptionDefrosting Defrost the freezer compartmentwhen a layer of ice 0.5 cm thickhas built up.A layer of i
Before using for the first time^Clean the inside of the appliance andthe accessories with warm water anda little washing-up liquid, and thendry with a
^Press the On/Off button to come outof setting mode.The electronics will then switch over tonormal operation after a couple ofminutes.Switching off fo
It is very important to set the correcttemperature for storing food in theappliance. Micro-organisms will causefood which is not stored at the correct
If you have adjusted the temperature,wait for approx. 6 hours if theappliance is not very full and forapprox. 24 hours if the appliance isfull before
^Press one of the temperature selectorbuttons repeatedly until^ appears inthe display.^Press the Super freeze button again.^ lights up in the display.
Your appliance has been fitted with awarning system which ensures that thetemperature in the freezer cannot riseunnoticed and to avoid energy beingwas
Super freezeSwitch the Super freeze function onbefore putting fresh food into thefreezer.This helps food to freeze quickly andretain its nutrients, vi
Guide to the appliance . . . . . . . . . . . . . . . . . . . . . . . . . . . . . . . . . . . . . . . . . . . . . 4Caring for the environment . . . . .
Maximum freezing capacityTo ensure that fresh food placed in thefreezer freezes through to the core asquickly as possible, the maximumfreezing capacit
Home freezingOnly freeze fresh food which is in agood condition.Hints on home freezing–The following types of food aresuitable for freezing:Fresh meat
^Make a note of the contents and thedate of freezing on the packaging.Before placing food in the freezercompartment^When freezing more than 2 kg offre
DefrostingFrozen food can be defrosted indifferent ways:–in a microwave oven,–in an oven using the "Fan" or "Defrost"setting,–at r
Freezer trayThe freezer tray is useful for freezingsmall items such as berries andvegetables. They can be frozenindividually and therefore maintain th
In normal use, ice and frost will form inthe freezer. If allowed to accumulate,this will impair the efficiency of thefreezer and increase the consumpt
After defrosting^Clean the appliance, and then dry itthoroughly.^Close the appliance door, insert theplug in the socket and switch theappliance back o
Never use cleaning agentscontaining abrasive substancessuch as sand, soda, acids, chloridesor chemical solvents."Non-abrasive" cleaning agen
Repairs to electrical appliancesshould only be carried out by asuitably qualified and competentperson in strict accordance withcurrent local and natio
. . . the compressor runscontinuously.To save energy, the compressor runs ata lower speed, but for longer, when lesscooling is required...food has fr
Cool pack. . . . . . . . . . . . . . . . . . . . . . . . . . . . . . . . . . . . . . . . . . . . . . . . . . . . . . . . 24Defrosting the appliance .
At the end of a power cut, theappliance will start operating again atthe last temperature setting selected.. . . the Super freeze indicator lightdoes
Normal noises What causes themBrrrrr... Humming noise made by the motor (compressor). This noise canget louder for brief periods when the motor is swi
In the event of a fault which you cannotcorrect yourself, or if the appliance isunder guarantee, please contact:–Your Miele Dealeror–The Miele Service
Electrical connection U.K.All electrical work should be carried outby a suitably qualified and competentperson in strict accordance with currentlocal
This appliance must be built in,otherwise it could tip up.LocationThe appliance should be installed in adry, well-ventilated room.The room temperature
Before installation^Before installation remove the coverstrip, sealing strip and otheraccessories from inside theappliance and from the external rearw
Niche height [mm]AF 9052 i 714 - 730F 9252 i 874 - 890Building-in dimensions36
Before building the appliance in, youwill need to decide on which side thedoor is to be hinged. If left hand doorhinging is required, follow theinstru
Do not separate the soft-closemechanism from the ball joint. Thiswould damage the mechanism.^Stand the appliance door up, andslacken the hinges at the
^ Fit the appliance door onto thepreviously fitted screws a, and thentighten the screws.^ Refit the covers b.^ Replace the locking pins into the topof
a Safety lock indicator lightb On/Off buttonc Temperature displaya Freezer drawers withfreezer calendard Temperature selector buttons(+ for warmer; –
All building-in instructions given arefor a right-hand hinged appliance.If you have converted the applianceto left-hand hinging, you will need toadapt
Building in the appliance^Push the appliance into its housingunit.When doing this, make sure that themains cable does not get trapped.^Depending on th
–screw two long 4 x 19 mm chipboard screws b loosely into themiddle of the long slot on the plasticbracket and then turn the plasticbracket downwards,
^ Hang the furniture door ontoadjusting bolts a.^ Loosely attach the nuts b on theadjusting bolts.^ Close the door and check thedistance between the d
^ Securing the appliance door to thefurniture door:– Screw fixing bracket a into thepre-drilled holes in the appliancedoor using hexagonal screw b.– C
The door hinges are set ex-works toenable the door to be opened wide.However, if the opening angle of thedoor needs to be limited for any reason,the h
46
47
M.-Nr. 07 021370 / 00en-GBAlteration rights reserved / 5106F 9052 iF 9252 i
Disposal of the packingmaterialThe transport and protective packinghas been selected from materials whichare environmentally friendly fordisposal, and
This appliance complies with allrelevant legal safety requirements.Improper use of the appliance can,however, present a risk of bothpersonal injury an
Technical safetyBefore setting up the appliance,check it for any externally visibledamage.Do not install and use a damagedappliance.This appliance con
Safe operation of the appliance isonly assured if it has been installedand connected in accordance withthese operating and installationinstructions.Th
Do not store cans or bottlescontaining carbonated drinks orliquids which could freeze in the freezersection. The cans or bottles couldexplode.Danger o
More documents for Fridge-freezers Miele F 9052 i

Related products and manuals for Fridge-freezers Miele F 9052 i
 (48 pages)
(40 pages)
(56 pages)
(44 pages)
(60 pages)
(48 pages)
(40 pages)
(56 pages)
(44 pages)
(60 pages)
© 2020, manymanuals.com. All rights reserved. | 1.627 s |
 Manymanuals.com
 Manymanuals.de
 Manymanuals.fr
 Manymanuals.it
 Manymanuals.pl
 Manymanuals.cz
 Manymanuals.es
 Manymanuals-pt.com
Comments to this Manuals