Miele S710 Operations Instructions
Browse online or download Operations Instructions for Vacuum cleaner supplies Miele S710. Miele S710 Operating instructions User Manual
- Page / 36
- Table of contents
- BOOKMARKS
- Operating instructions 1
- Vacuum cleaners 1
- S 700 - S 718 1
- Contents 2
- Caring for the environment 3
- Description of the appliance 5
- Correct application 6
- Safety with children 6
- Technical safety 7
- Correct use 8
- Accessories 9
- Preparing for use 10
- Accessories supplied 13
- Standard floorhead 14
- Crevice nozzle 14
- Dusting brush 15
- Upholstery nozzle 15
- Mains cable 16
- Switching on and off 16
- Vacuuming 16
- Adjusting the suction power 17
- Rotary selector 17
- Opening the air inlet valve 17
- Parking system 18
- Transportation and storage 18
- Maintenance and care 19
- Cleaning and care 27
- Optional accessories 29
- Electrical connection 35
- M.-Nr. 07 316 590 / 00 36
Summary of Contents
Operating instructionsVacuum cleanersS 700 - S 718To avoid the risk of accidents or damageto the appliance, it is essential to read theseinstructions
Attaching the suction hose^Insert the hose connector into thesocket until it clicks into position.Removing the suction hosefrom the cleaner^ Press the
Your vacuum cleaner is fitted with oneof the following suction tubes,depending on model:–Connecting tubes–2-part telescopic tubeConnecting the suction
Fitting the standard floorhead^Push the suction tube into thefloorhead and turn it clockwise oranti-clockwise until it clicks intoposition.^To release
Other tools, in addition to thefloorhead(s), are supplied with thevacuum cleaner to help deal withvarious types of cleaning.a Crevice nozzleb Dusting
The different tools can either be fitted tothe hand piece or to the suction tube,as required.Standard floorheadFor general use and also for vacuumings
Dusting brushFor cleaning skirting boards, ornate orcarved articles, etc.The head of the dusting brush can beswivelled to attain the best cleaningposi
Mains cableUnwinding the cable^Pull out the mains cable to therequired length (max. approx. 6.5 m).,If vacuuming for longer than 30minutes, the mains
Adjusting the suction powerThe suction power can be regulated tosuit the type of flooring. The higher thewattage, the more powerful the suction.Reduci
Parking systemA parking system has been designedfor conveniently parking the vacuumcleaner during pauses.^Slot the floorhead into the parkingattachmen
,Always disconnect the vacuumcleaner from the electricity supplyfor maintenance work and forcleaning. Switch off at the wallsocket and remove the plug
Caring for the environmentDescription of the applianceWarning and Safety instructionsPreparing for useAccessories suppliedUsing the accessories suppli
When to change the dustbagChange the dustbag when the colourmarker in the dustbag change indicatorfills the display, or sooner if it is nolonger effec
Replacing the dustbag^Press the release button for the dustcompartment lid and raise the lid asfar as it will go.^To remove the dustbag, hold the bagb
When to change the exhaustfilterDepending on the model, your vacuumcleaner will be fitted as standard withone of the following exhaust filters:a a Sup
Replacing the Super Air CleanfilterDo not use more than one exhaustfilter at a time.^Open the dust compartment lid.^Release the filter grille and rais
Replacing an Active Air Cleanfilter or a HEPA filterDo not use more than one exhaustfilter at a time.^Open the dust compartment lid.^Release the catch
When to change the dustcompartment filter (for motorprotection)Replace this filter every time you start anew packet of dustbags.A dust compartment fil
When to change the threadliftersThe thread lifters on the suction inlet tothe floorhead and the upholstery nozzlecan be replaced.Check them from time
,Always disconnect the vacuumcleaner from the electricity supplyfor maintenance work and forcleaning. Switch off at the wallsocket and remove the plug
The vacuum cleaner switches offautomatically.A temperature limiter switches thevacuum cleaner off automatically if itgets too hot.This can occur if, f
Miele accessories includingfloorheads, filters and dustbags areavailable to order from yourChartered Agent, the Miele SpareParts Department or via the
Disposal of packing materialThe transport and protective packinghas been selected from materials whichare environmentally friendly for disposaland can
ALLERGOTEC -3 floorheadThe level of cleanliness of the floorshows in a colour "traffic light" displaywhen vacuuming. The ALLERGOTECfloorhead
Universal brushFor dusting books, shelves, etc.Radiator brush(Can only be used if attached to thecrevice nozzle).For cleaning radiators, narrow shelve
Mattress nozzleFor cleaning upholstery, mattresses,cushions, curtains, covers etc.Crevice nozzle (300 mm)For cleaning in folds, crevices orcorners.Hos
Hygiene seal with active charcoalThis prevents dust and odours fromescaping when the suction hose isremoved for transportation or storage.It can be se
Active Air Clean filterA special active charcoal filter, whichremoves odours coming from the dirt inthe dustbag, keeping unpleasantlingering smells to
Electrical connectionAll work should be carried out by asuitably qualified and competentperson in strict accordance withnational and local safety regu
Alteration rights reserved / (710-718) - 1508M.-Nr. 07 316 590 / 00Downloaded From Vacuum-Manual.com Manuals
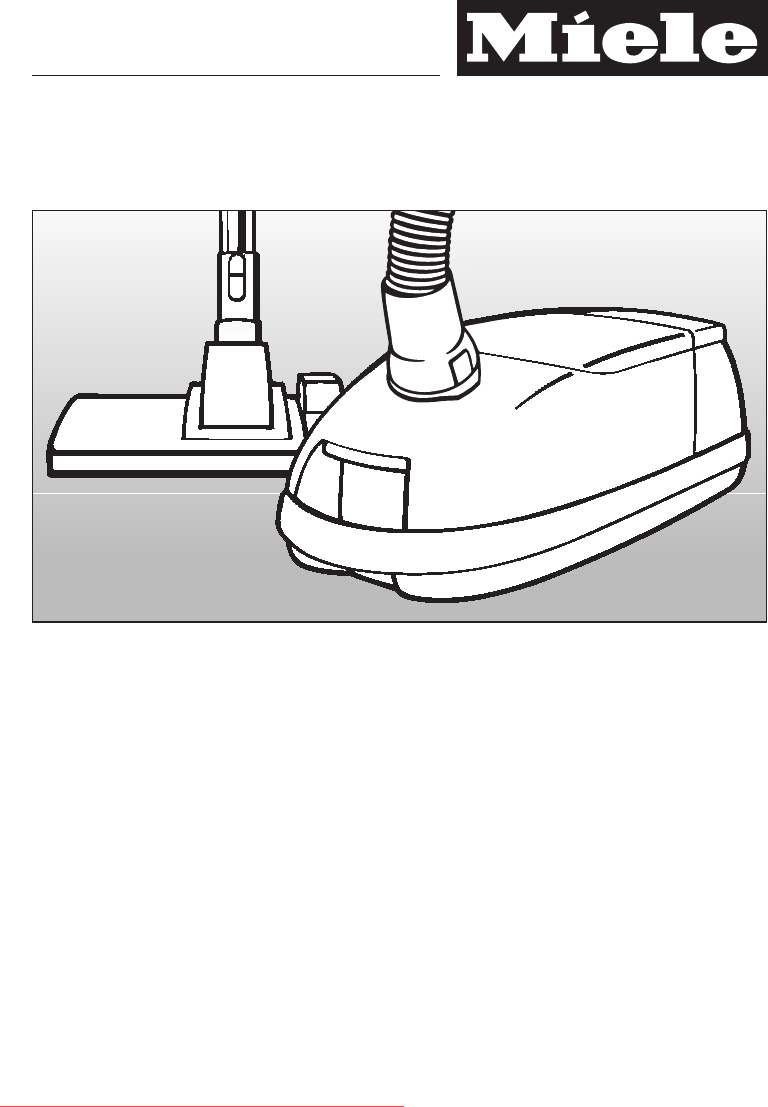
Description of the appliance4Downloaded From Vacuum-Manual.com Manuals
a Hand pieceb Air inlet valvec Release buttond Telescopic suction tube*e Telescopic tube release button*f Dust compartment release buttong Dust compar
This vacuum cleaner meets statutorysafety requirements. Improper usecan, however, lead to personal injuryand material damage.To avoid the risk of acci
Technical safety~Ensure that the connection data onthe data plate (voltage and frequency)match the mains electricity supply. It isessential that they
Correct use~To avoid the risk of damage, do notuse the vacuum cleaner without thedustbag, dust compartment filter andexhaust filter in place. Otherwis
AccessoriesMiele accessories includingfloorheads, filters and dustbags areavailable to order from yourChartered Agent or the Miele SpareParts Departme
Related products and manuals for Vacuum cleaner supplies Miele S710
 (44 pages)


 (112 pages)
© 2020, manymanuals.com. All rights reserved. | 0.996 s |
 Manymanuals.com
 Manymanuals.de
 Manymanuals.fr
 Manymanuals.it
 Manymanuals.pl
 Manymanuals.cz
 Manymanuals.es
 Manymanuals-pt.com
Comments to this Manuals