Miele CVA 4085 Operations Instructions
Browse online or download Operations Instructions for Coffee makers Miele CVA 4085. Miele CVA 4085 Operating instructions User Manual
- Page / 88
- Table of contents
- BOOKMARKS
- Built-in coffee machine 1
- CVA 4085 1
- Contents 2
- Caring for the environment 5
- Description of the machine 6
- Correct use 8
- Technical safety 8
- Brief description 12
- Operating the coffee machine 14
- Adding ground coffee 18
- Making coffee 19
- Setting the coffee grinder 27
- Selecting a language 30
- Time of day 31
- Setting the timer 32
- Amount of coffee 34
- Pre-brewing 35
- Temperature 36
- Automatic rinsing 37
- Steam system 38
- Settings 39
- ß Automatic rinsing 39
- ß Steam system 39
- ß Lighting 39
- Setting the water hardness 42
- Selecting a user profile 46
- Buzzer tones 47
- Plate warmer 48
- Plumbed in water supply 49
- Factory default 49
- Setting the portion sizes 50
- Cleaning and care 51
- Descaling the machine 65
- Problem solving guide 68
- After sales service 77
- Installation 82
- M.-Nr. 06 867 310 / 01 88
Summary of Contents
Operating and installation instructionsBuilt-in coffee machineCVA 4085To avoid the risk of accidentsor damage to the machine,it is essential to read t
UseCaution. Danger of scalding. Thespouts and the liquids dispensedare very hot.Never look directly at the lighting oruse optical instruments to look
Do not use steam cleaningapparatus to clean the machine.Pressurised steam could reach theelectrical components and cause ashort circuit.Clean the mach
This machine can be used to prepareespresso, coffee, cappuccino, milkfroth and hot water .This machine has a container for coffeebeans so that they ca
To ensure that the flavour can developfully and be maintained for longer themachine has an additional function toautomatically rinse and pre-warm thes
The following notes should help you get to know your coffeemachine before starting to use it.Sensor controlsThis machine has sensor controls which rea
The welcome screen will be displayed each time the machineis switched on until the first 5 drinks (including steam) havebeen prepared:MíeleWillkommenW
Please clean the machine thoroughly before filling it (see"Cleaning and care").Filling and emptying the water containerThe quality of the wa
^If filling the water container manually, take off the lid and fillthe water container with cold, clean tap water up to the"Max." mark.A val
^Pull the lid forwards again, push the coffee bean containerback into place and close the machine door.Adding ground coffeeIf you want to use ready gr
Important: the water piping must be rinsed through everyday and the machine cleaned thoroughly before the firstdrink of coffee is prepared. Rinsing wi
Caring for the environment . . . . . . . . . . . . . . . . . . . . . . . . . . . . . . . . . . . . . . . . . . 5Description of the machine. . . . . .
Pre-warming cupsThe cups should always be pre-warmed to allow the flavourto develop and be retained. The aroma of espresso does notreact well to cold
Preparing espresso and coffee from freshly ground beans^Place a cup under the coffee spouts.The coffee is always dispensed simultaneously from bothspo
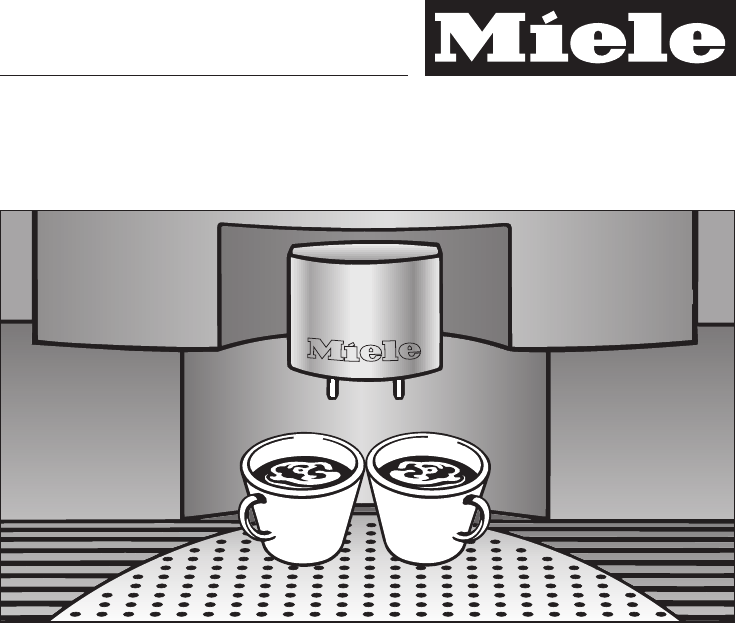
To prepare two cups at the same time^Place a cup under each of the coffee spouts.^Touch the sensor beside espresso or coffee and then touchthe sensor
If you have not added any ground coffee, youmust select "No". Otherwise the machine willassume that there is ground coffee in the chuteand s
Cappuccino and milk frothUsing for the first timeBefore the coffee machine leaves the factory, the pipework iscompletely pumped out. For this reason,
CappuccinoTo prepare a cappuccino you will need a large china orporcelain cup and a jug of milk.Froth is best made from cold, skimmed orsemi-skimmed m
Frothing milkTo froth milk separately, use a cold, stainless steel jug thatnarrows towards the top. Froth is best made from cold,semi-skimmed milk.^Fi
A good espresso or coffee with a thick, even crema (froth)depends not only on the quality, pressure and temperature ofthe water and the quality of the
To alter the grinder setting^push the slide control to the left (for finer grinding) or to theright (for coarser grinding).You should be able to feel
It is easy to customise your machine to suit your exactrequirements. The following settings are available:Language: Czech, Danish, German, English, Sp
Settings: Customising your machine. . . . . . . . . . . . . . . . . . . . . . . . . . . . . . . . . 29Selecting a language. . . . . . . . . . . . . .
Plate warmer: Automatic, On, OffPlumbed in water supply: On, OffFactory default: All settings, User profilesA more detailed explanation of the program
Time of day^Touch the upper or lower sensor on the right until "Settings"is visible on the left of the display.^Touch the sensor beside &quo
Setting the time of day^Touch the sensor beside "Set".^First set the hours by touching the sensors on the rightbeside "+" or "
If rinsing is set to "On", the machine will automaticallycarry out a brief rinse when it switches itself on.If the machine has switched itse
Switch off at:If you always use your machine at a particular time of the dayyou can set it to switch off automatically at a specific time.^Touch the s
–If the crema is very dark brown on one side, graduatingalmost to white on the other, it could mean that too muchcoffee is being used.Select the User
Settingsß Timerß Amount of coffeeß Pre-brewing^Touch the sensor beside "Pre-brewing".A tick will appear beside the option which is currently
A tick will show which temperature is currently set for thistype of drink.^Touch the sensor beside "ok".You can now alter the temperatures f
Steam systemThe machine has two heating systems. This means that thecoffee machine can be used not only to prepare espresso /coffee but also to prepa
Lighting (with the machine switched on)The "Lighting" option in the "Settings" menu allows you todecide which type of lighting to
Cleaning and care . . . . . . . . . . . . . . . . . . . . . . . . . . . . . . . . . . . . . . . . . . . . . . . . 51Rinsing . . . . . . . . . . . . .
^Touch the middle sensor on the left or the right to set thebrightness.^Touch the sensor beside "ok" to save the setting.^Touch the "+
^Set the duration after which you want the lighting to switchoff by touching the sensors on the right beside "+" or "-".^Touch the
The tick will show if the system lock has been set to "Can beactivated" or "Cannot be activated".^Touch the sensor beside "Ca
Your local water authority will be able to tell you the hardnessof water in your area. Alternatively, you can measure thehardness yourself using the e
To set the correct water hardness level,^touch the sensor beside "Settings".Settingsß Total no. of coffeesß System lockß Water hardness^Touc
CreateTo create a new User profile,^Touch the sensor beside "Set".^Touch the middle sensor on the right or left of the displayuntil the firs
^Now change the name and touch the sensor beside "ok".ChangeYou can programme the machine so that it always reverts tothe Standard profile o
DisplayYou can adjust both the contrast and the brightness of thedisplay:^Touch the sensor beside "Settings".Settingsß Water hardnessß User
Plate warmerYou can connect a Miele EGW 4000-14 or EGW 4000-29plate warmer to the coffee machine using a specialconnection cable available as an optio
Plumbed in water supplyThe machine is designed to be plumbed into the mainsdrinking water supply. This mains water connection can beswitched on or off
Disposal of the packingmaterialThe transport and protective packinghas been selected from materials whichare environmentally friendly for disposaland
The flavour of the coffee produced depends on the type ofcoffee, the amount of coffee used, how finely the beans areground and particularly, the quant
Always allow the machine to cool down before cleaning.Danger of scalding.Do not clean the machine with a steam cleaner as this willdamage the machine.
Water containerEmpty the water container daily and - if you are not using theplumbed in water supply - fill with fresh, cold drinking waterjust before
^Also clean the now accessible area in the machine wherethe waste container sits, thoroughly.^Push the waste container fully back into the machine.Dri
^Push the drip tray with the grid along the right hand edgeback into the machine.^Close the machine door.Grille with drip tray cover^ Take the grille
Coffee outlet connectionThe part which connects the brew unit and the coffee outlet islocated on the inside of the machine door.^Clean this connection
Brew unitThe brew unit must be cleaned manually once a weekbecause the moving parts are lubricated and the rubberseals could become brittle in a dishw
^Wipe any remaining coffee off the two filters. One filter islocated in the funnel a and the other to the left of thefunnel b.^ Dry the funnel area a
Degreasing the brew unitDepending on the natural oil content of the coffeeused, the brew unit could become blocked. Itshould therefore be cleaned afte
When Please place a cleaning tablet in the ground coffeechute appears in the display,^Remove the coffee chute cover and open the lid of thecoffee chut
External viewa Operating sensor controls. Lowest sensor = On / Offb Displayc Operating sensor controls. Lowest sensor "+ C" = Cleard Upper l
^Touch the sensor beside "Maintenance".^Touch the sensor beside "Rinse Cappuccinatore".^Place a glass of water under the suction t
^Dismantle the parts. Remove the part with the seals byturning and then pulling it.^Wash the parts in the dishwasher. After cleaning, lubricatethe sea
^that all the guide points line up.^ Place the Cappuccinatore in the machine from below aand turn the cover above the spout in the direction of thearr
Machine front^Clean the front of the machine with a solution of hot waterand washing-up liquid applied with a damp cloth. Wipeeverything dry with a so
Aluminium frontsAluminium is affected by the way that light falls on it, by thesurrounding environment and by the angle you observe itfrom.Aluminium s
The machine should be descaled regularly to ensure that itfunctions correctly. It will remind you when this needs to becarried out.When only 50 portio
To run the descaling programme^If you want to descale the machine before it has heatedup touch the sensor beside "Descale" in the initial me
^Fit the descaling funnels under the spouts as illustrated.The bottom of the funnel fits into the drip tray to enable thedescaling agent to be collect
Repairs to electrical appliances should only be carried outby a suitably qualified and competent person in strictaccordance with current local and nat
. . . the machine suddenly switches itself off.The machine will switch itself off automatically after a certainlength of time if it is not being used.
Interior viewa Master switchb Ground coffee chute coverc Ground coffee chuted Slide control to select fineness of ground coffeee Coffee bean container
. . . the coffee grinder makes a louder noise than usual.There could be stones in amongst the coffee beans.^Switch the machine off immediately.^Contac
^Select a slightly coarser coffee grinder setting or a lowersetting for the amount of coffee to be ground.. . . the machine door will not close.^Are t
^Buff the contacts a little, e.g. with fine glasspaper or emerycloth.^If this fault message continues to appear, please call theMiele Service Departme
. . . the coffee machine makes loud noises during thedescaling programme.During the descaling programme you will hear loud noises aswater is flushed t
. . . the fault message 10 or 17 appears.Water has not been taken in.^The water container has not been correctly positionedinside the machine. Remove
. . . too much crema has formed and is overflowing abovethe coffee spouts.Some types of coffee will produce too much crema if thecoffee or espresso te
. . . fault message 73 appears in the display.The brew unit is dirty and cannot be positioned correctly.^Touch the "+ C" sensor.^Take the br
In the event of a fault which you cannot correct yourself,please contact:–your Miele Dealeror–the Miele Service Department (see back cover foraddress)
Notes on connecting to the mains water supplyConnection to the mains water supply should only becarried out by a qualified and competent person in str
Connecting the water inlet hose to the coffeemachine^Remove the cover cap from the bottom of the back panel ofthe machine. Connect the angled end of t
This machine complies with allrelevant legal safety requirements.Improper use can, however, presenta risk of both personal injury andmaterial damage.T
All electrical work should be carried out by a suitablyqualified and competent person only, in strict accordancewith current national and local safety
Non-rewireable plugs BS 1363The fuse cover must be refitted when changing the fuse, andif the fuse cover is lost, the plug must not be used until asui
Building-in and combination optionsThe coffee machine is designed to be built into a tall unit.It can also be combined with other Miele built-in appli
InstallationBefore installation make sure that there is no power supplyto the machine. This also applies should it ever need to betaken out of its hou
^Connect the machine to the electricity supply.^Push it all the way into the niche until you feel resistance.^Open the machine door and partially tigh
Adjusting the door hingesIf the machine door becomes difficult to open or close afterinstallation you can adjust the hinges to realign it:^ To adjust
86
87
M.-Nr. 06 867 310 / 01en-GBAlteration rights reserved / 0207CVA 4085
This equipment may only be usedin mobile installations such asships, caravans, aircraft etc. if a riskassessment of the installation has beencarried o
Related products and manuals for Coffee makers Miele CVA 4085
 (76 pages)
 (1 pages)
(76 pages)
(84 pages)
(88 pages)
(1 pages)
(76 pages)
(84 pages)
(88 pages)
© 2020, manymanuals.com. All rights reserved. | 6.037 s |
 Manymanuals.com
 Manymanuals.de
 Manymanuals.fr
 Manymanuals.it
 Manymanuals.pl
 Manymanuals.cz
 Manymanuals.es
 Manymanuals-pt.com
Comments to this Manuals